Building Your Self-Hosted Hacking Lab - Part 1

As someone who's really into cybersecurity, I've always been interested in those hands-on training setups like Hack the Box and TryHackMe. But now, I want to take my interest a step further and make my own hacking lab using VirtualBox VMs. The idea of creating my own challenges and vulnerabilities is super exciting, and I'm really pumped to share how I'm making this happen.

The Initial Phase: Getting Everything Set Up
In this first tutorial, I'll walk you through the initial steps of setting up your hacking lab. We'll cover the essential groundwork, including the installation of VirtualBox, configuring an Ubuntu Linux server, and installing the OWASP Bricks application for pentesting exercise. Keep in mind that this is just the beginning, and future posts will delve into setting up additional applications for more hacking lab exercises.
Step 1: Installing VirtualBox
To get started, we'll need a virtualization platform, and VirtualBox is the tool of choice. It's user-friendly and powerful, making it perfect for our hacking lab setup. You can download VirtualBox from their official website and follow the installation instructions tailored to your operating system.

It's important to mention that we won't be providing a complete walkthrough of the VirtualBox installation process here, as the steps can differ across various operating systems.
Step 2: Configuring an Ubuntu Linux Server
Next, we'll set up an Ubuntu Linux server to serve as our hacking playground. Ubuntu is a popular choice due to its widespread community support.
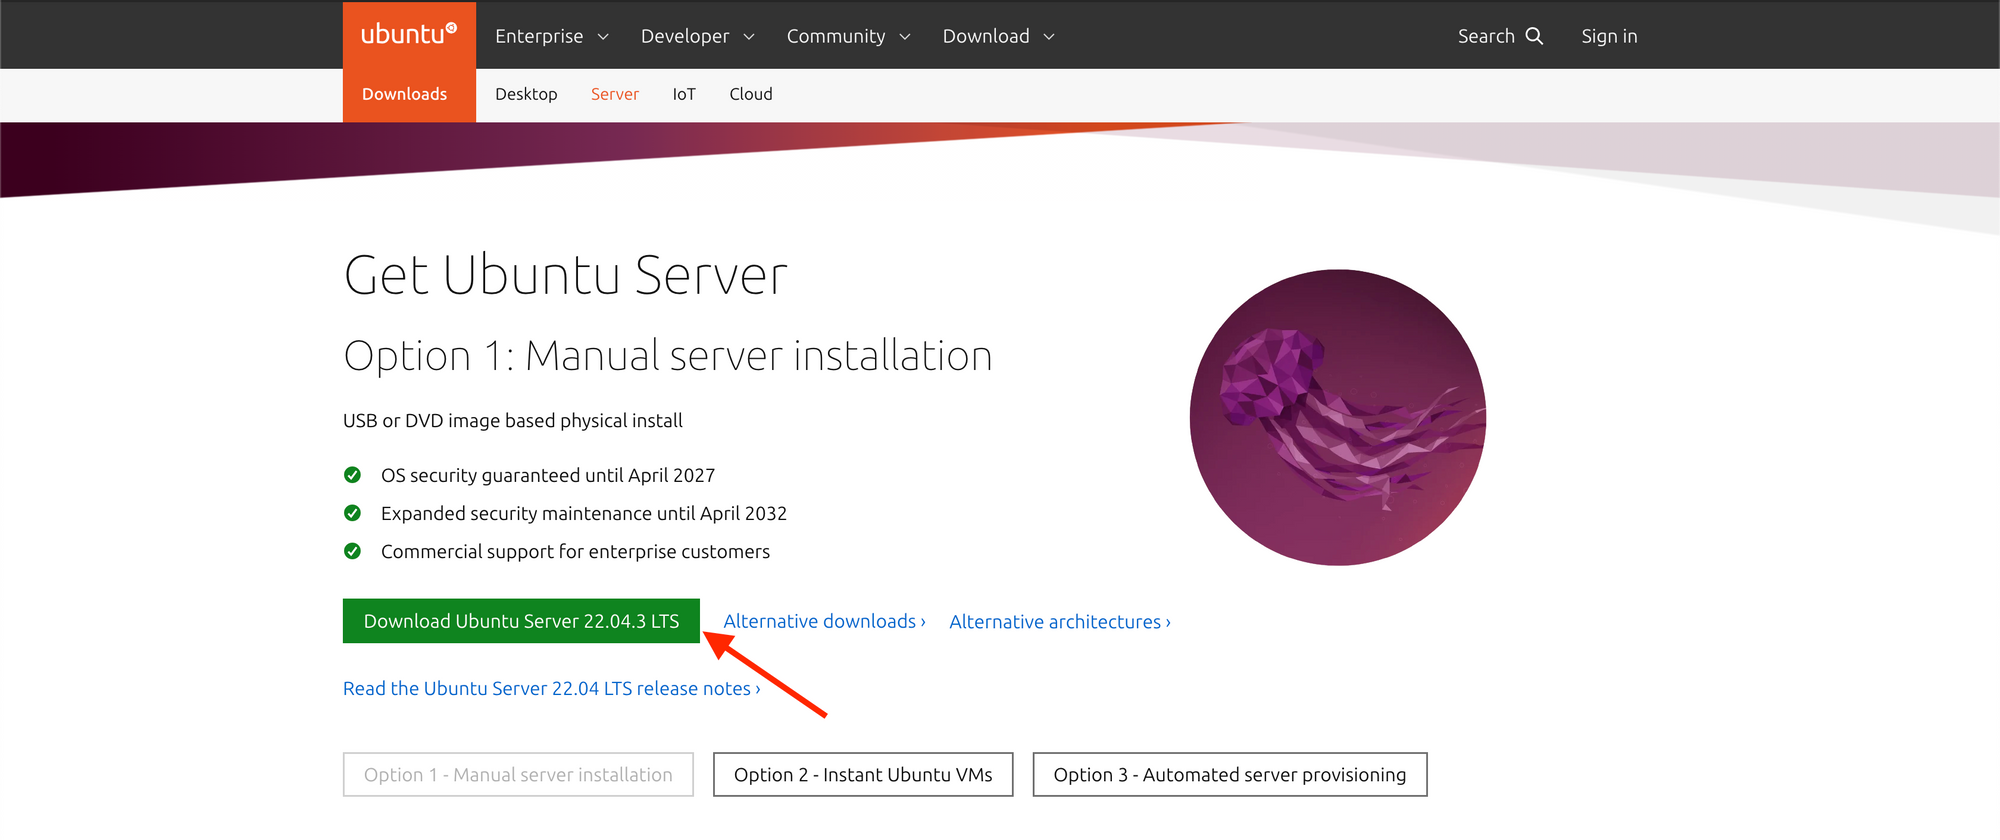
1- Download Ubuntu Server ISO: Begin by visiting the official Ubuntu website and downloading the Ubuntu Server ISO file.
https://ubuntu.com/download/server
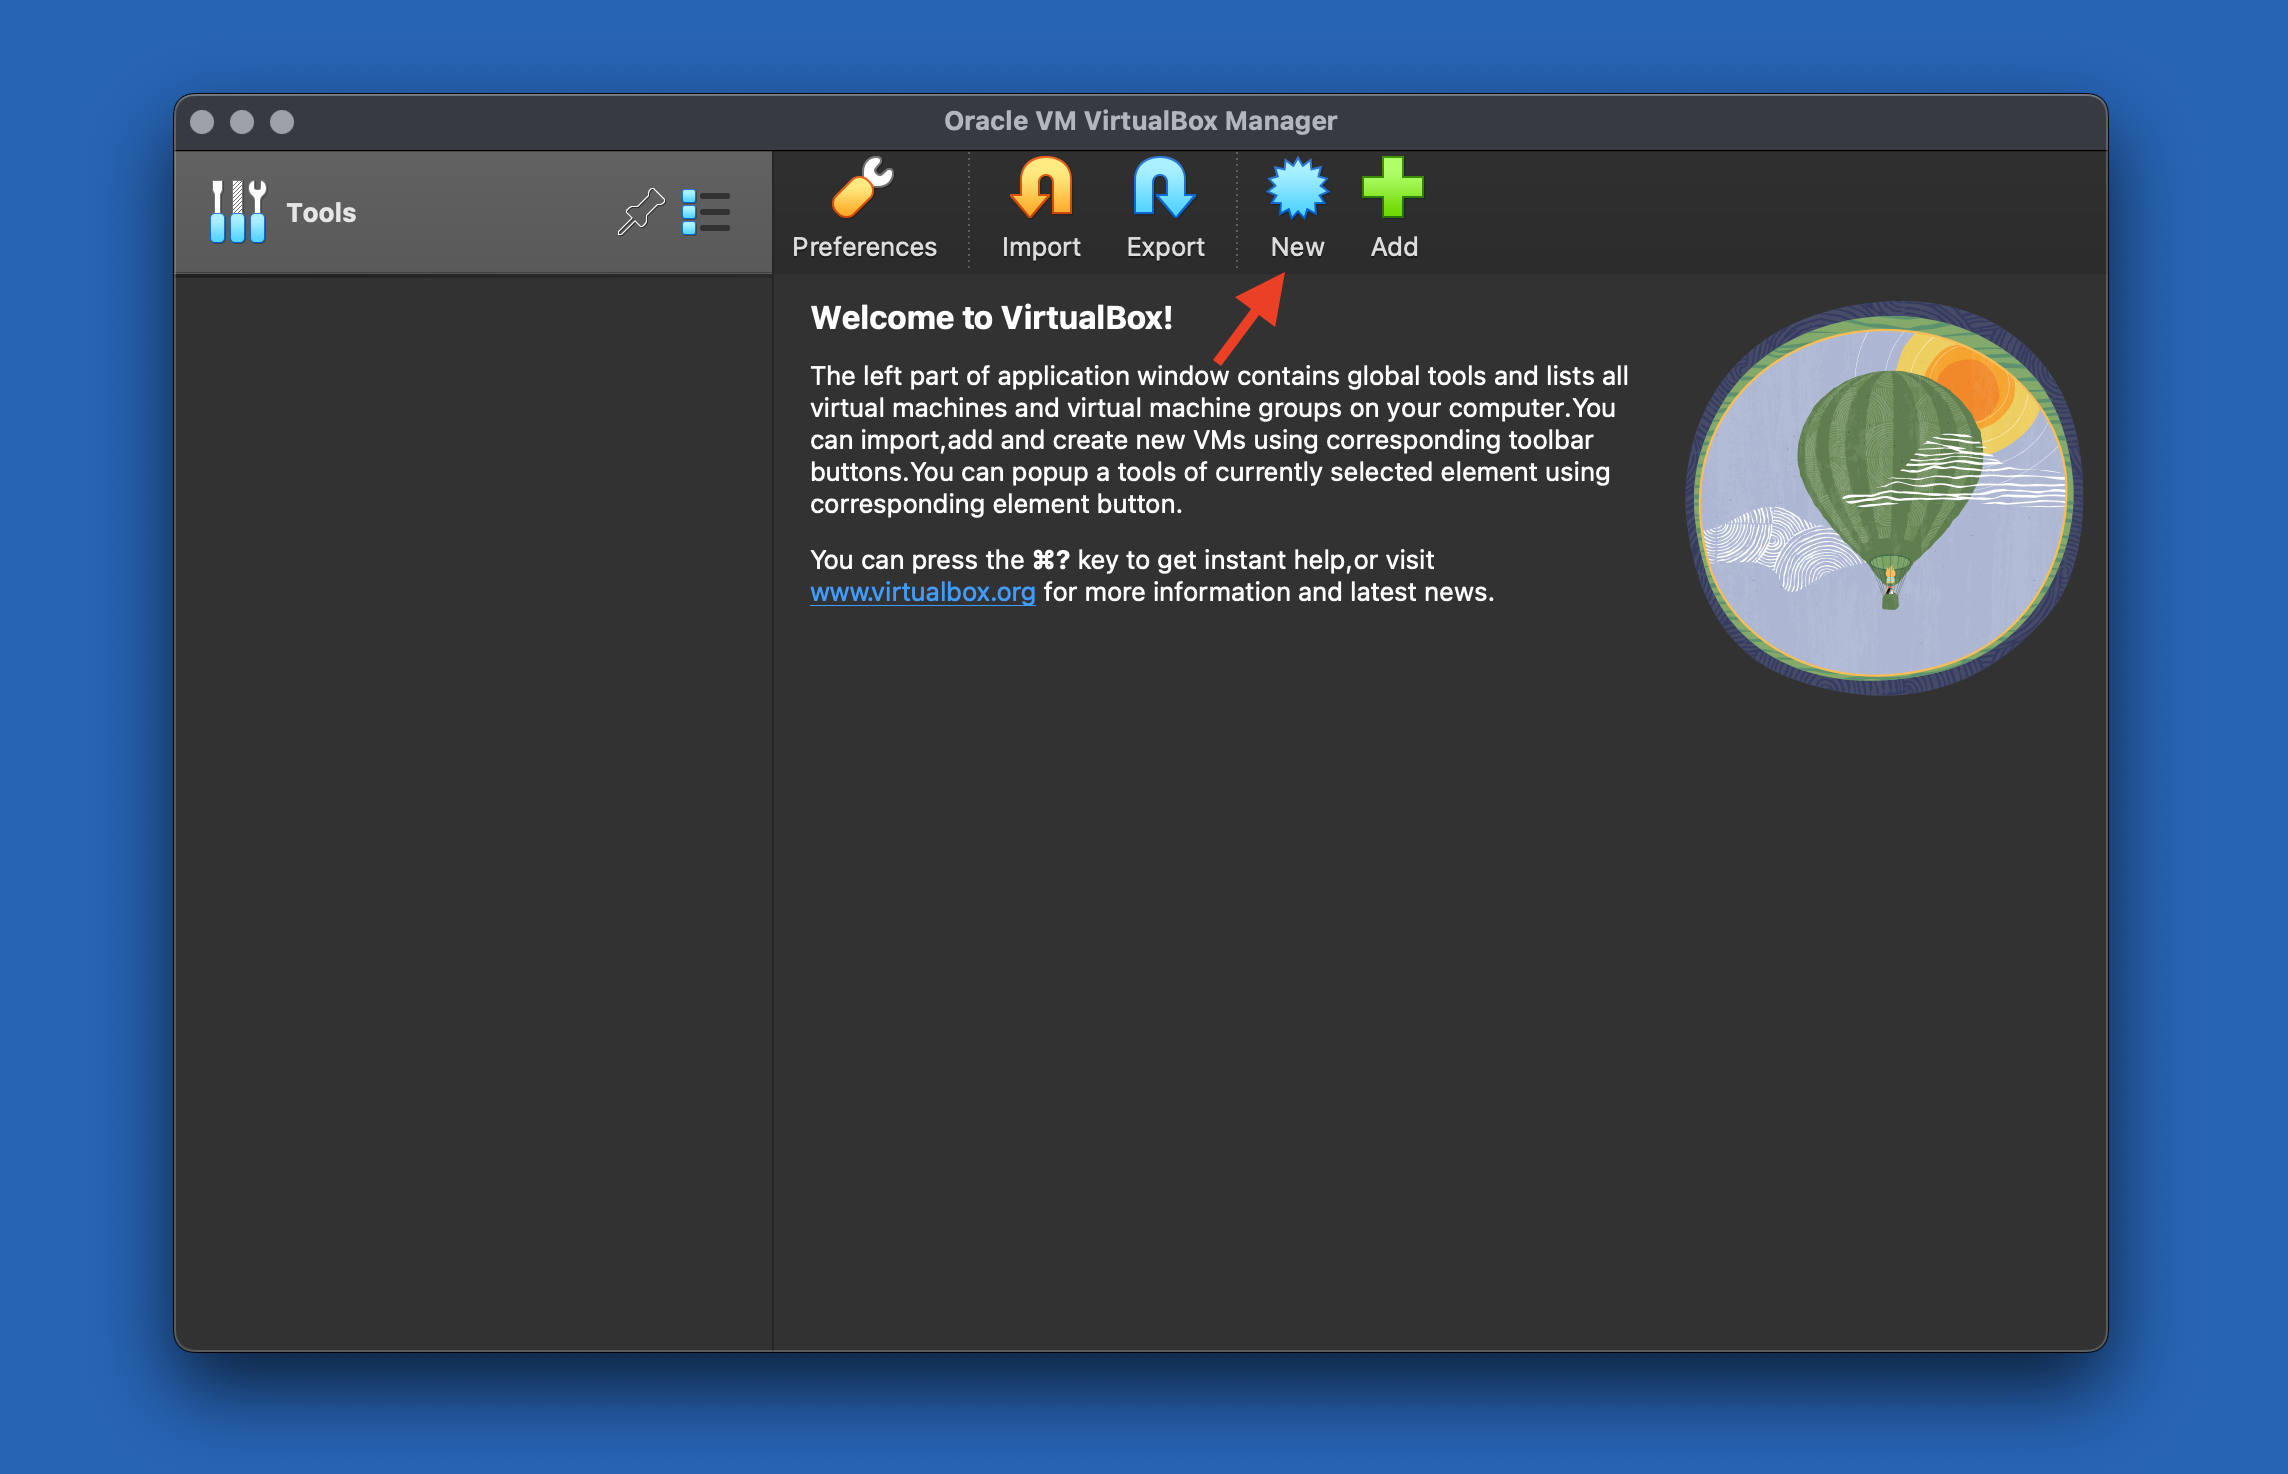
2- Create a New Virtual Machine:
Open VirtualBox and click "New" to create a new virtual machine.
Select the Ubuntu server ISO image. The OS type and version will automatically select.
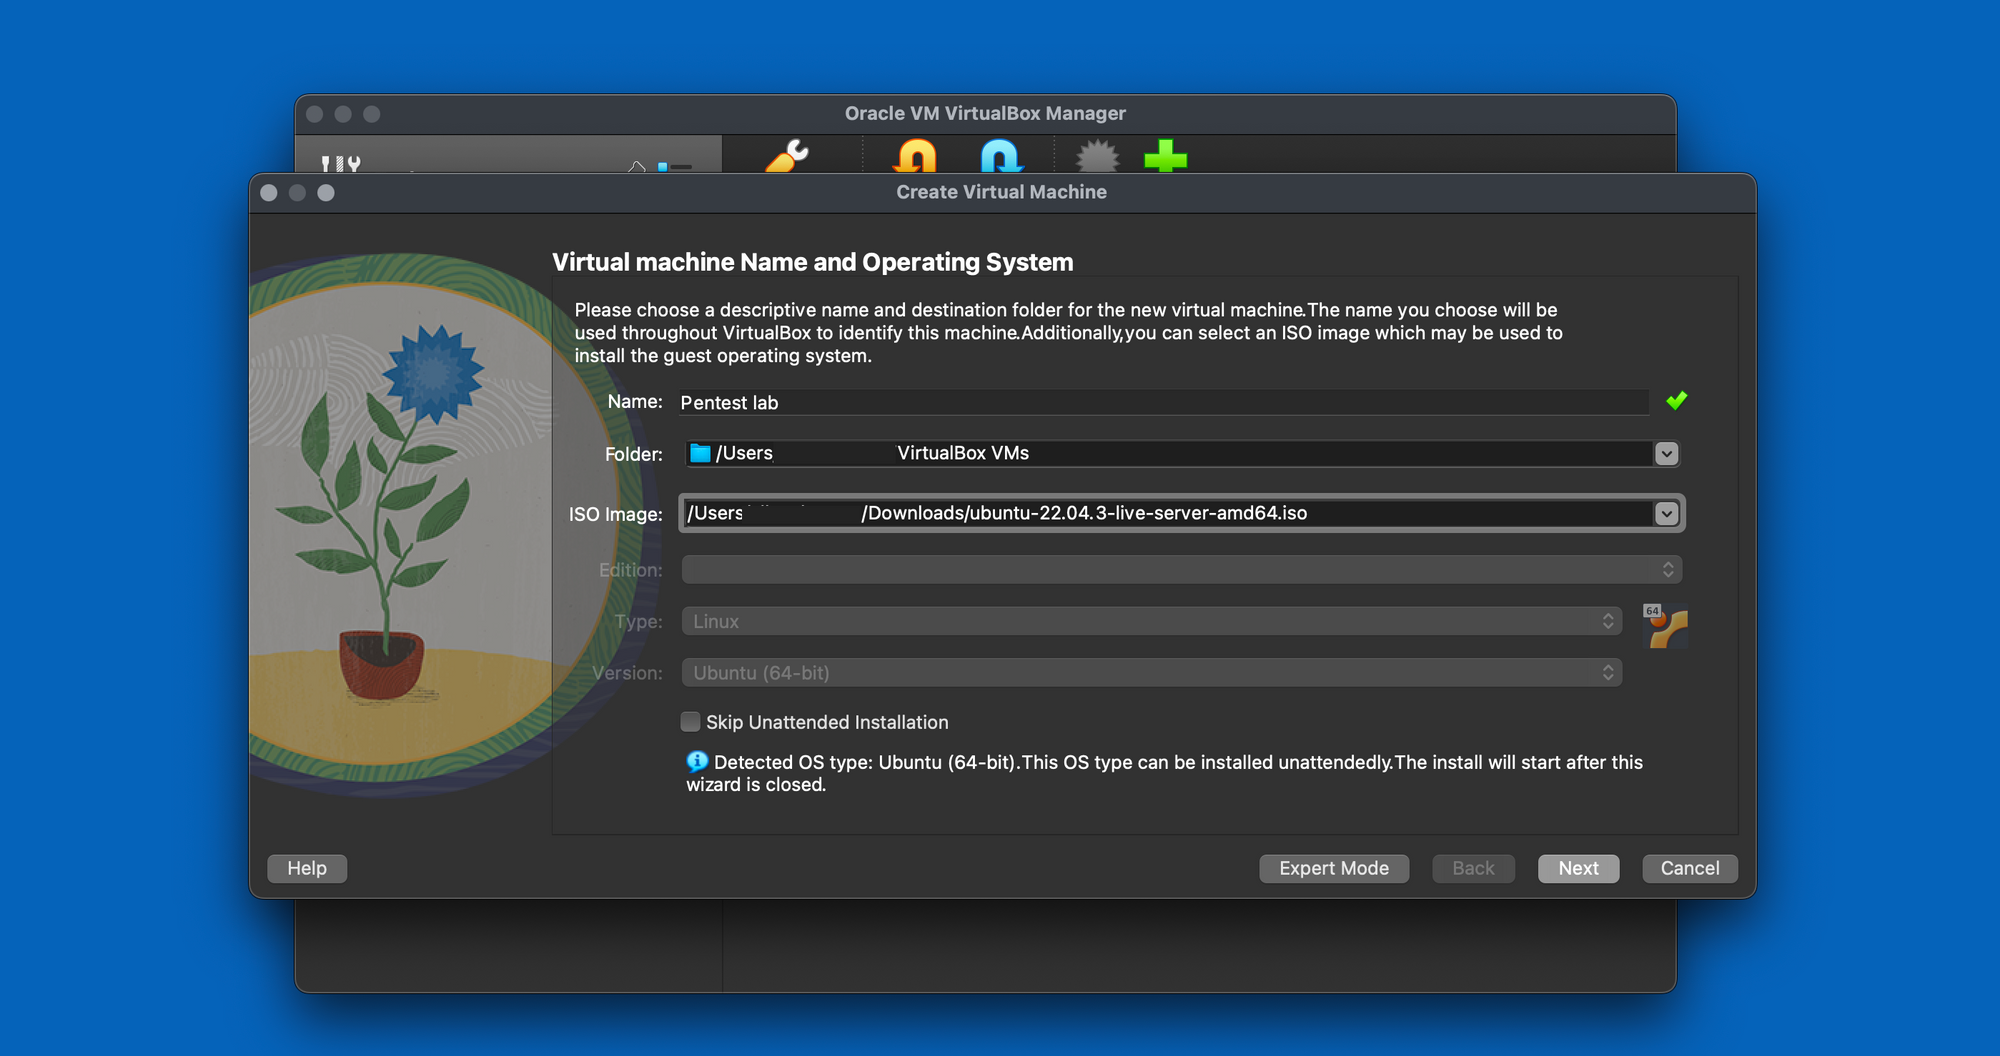
Then set a username and password for the OS installation.
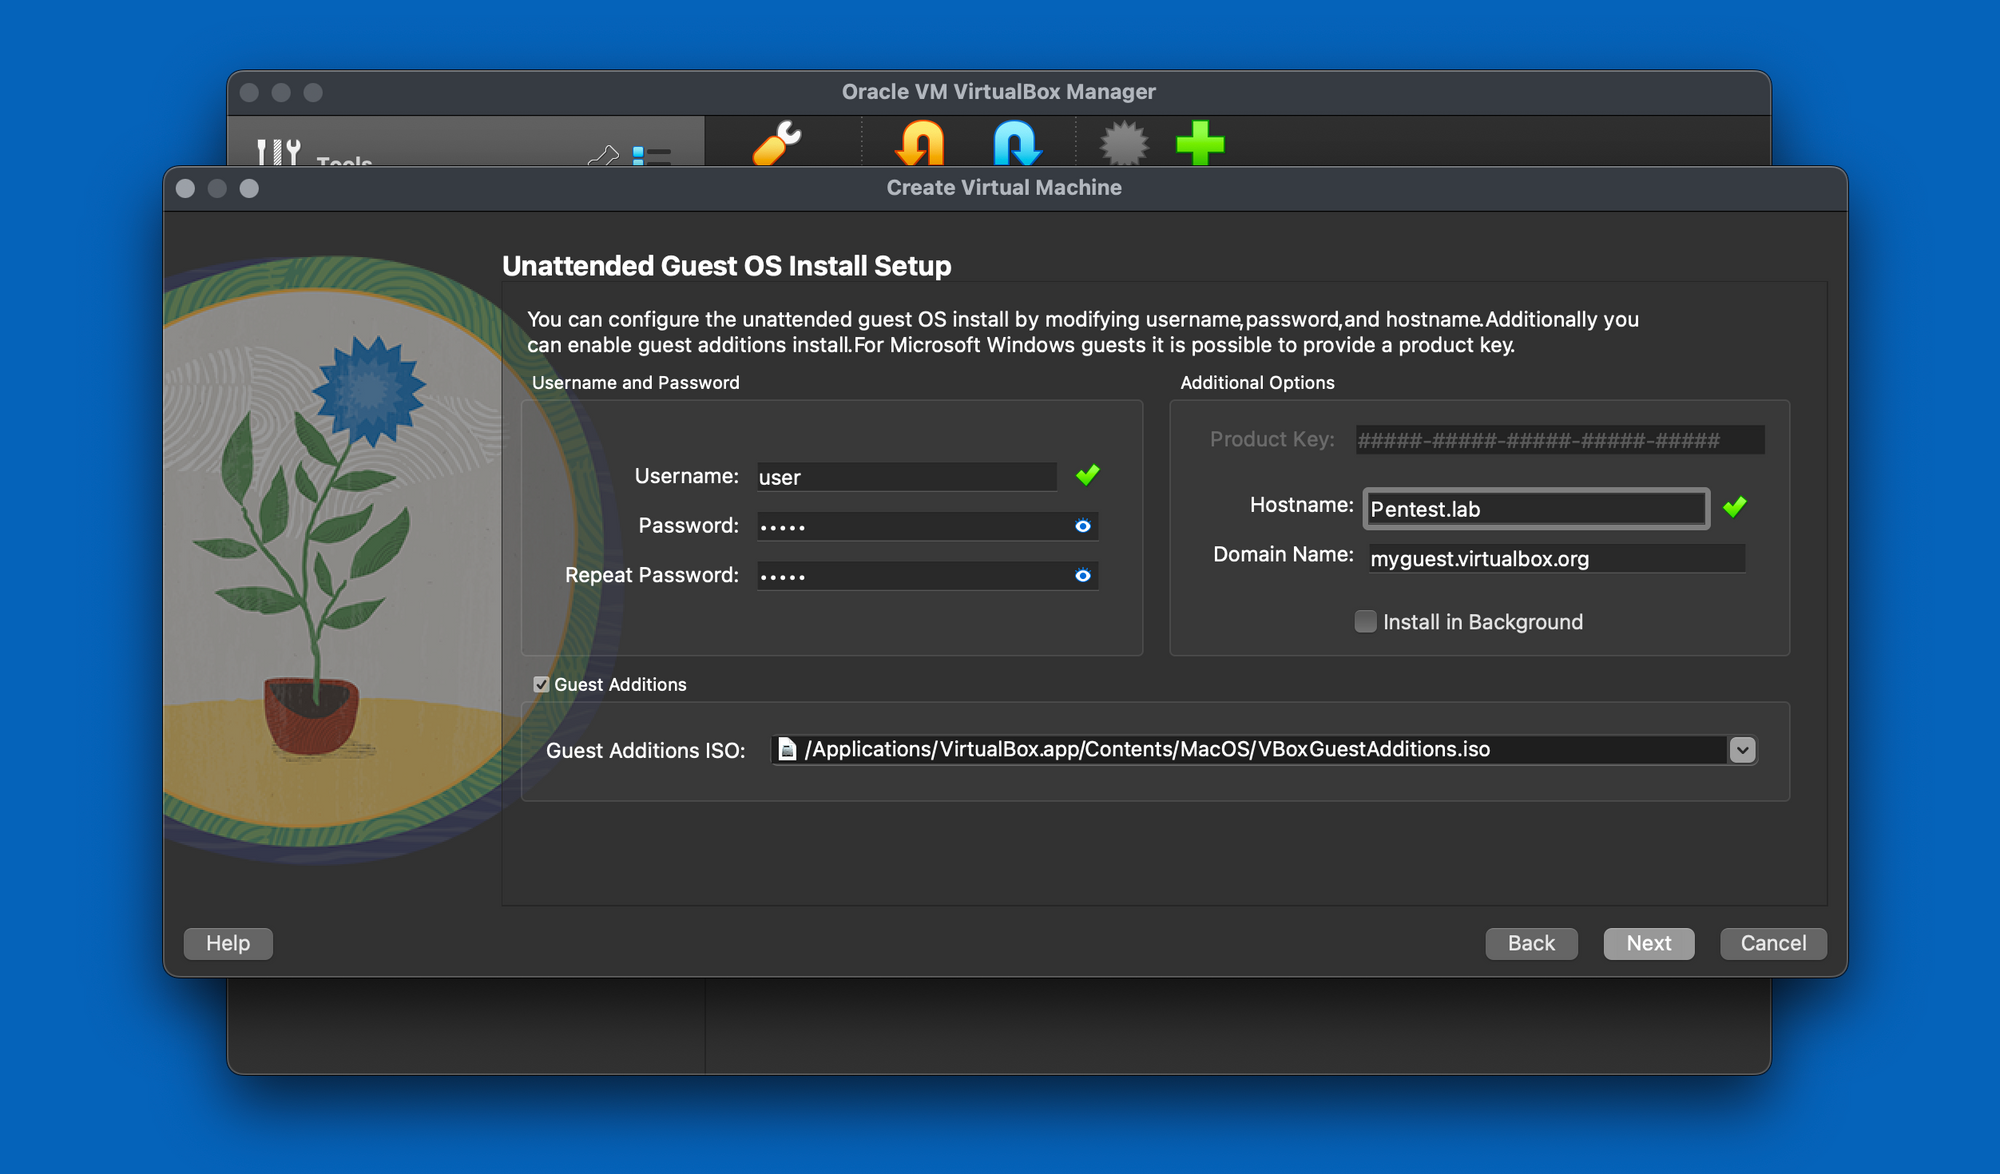
Allocate an appropriate amount of RAM and create a new virtual hard disk with the recommended size.
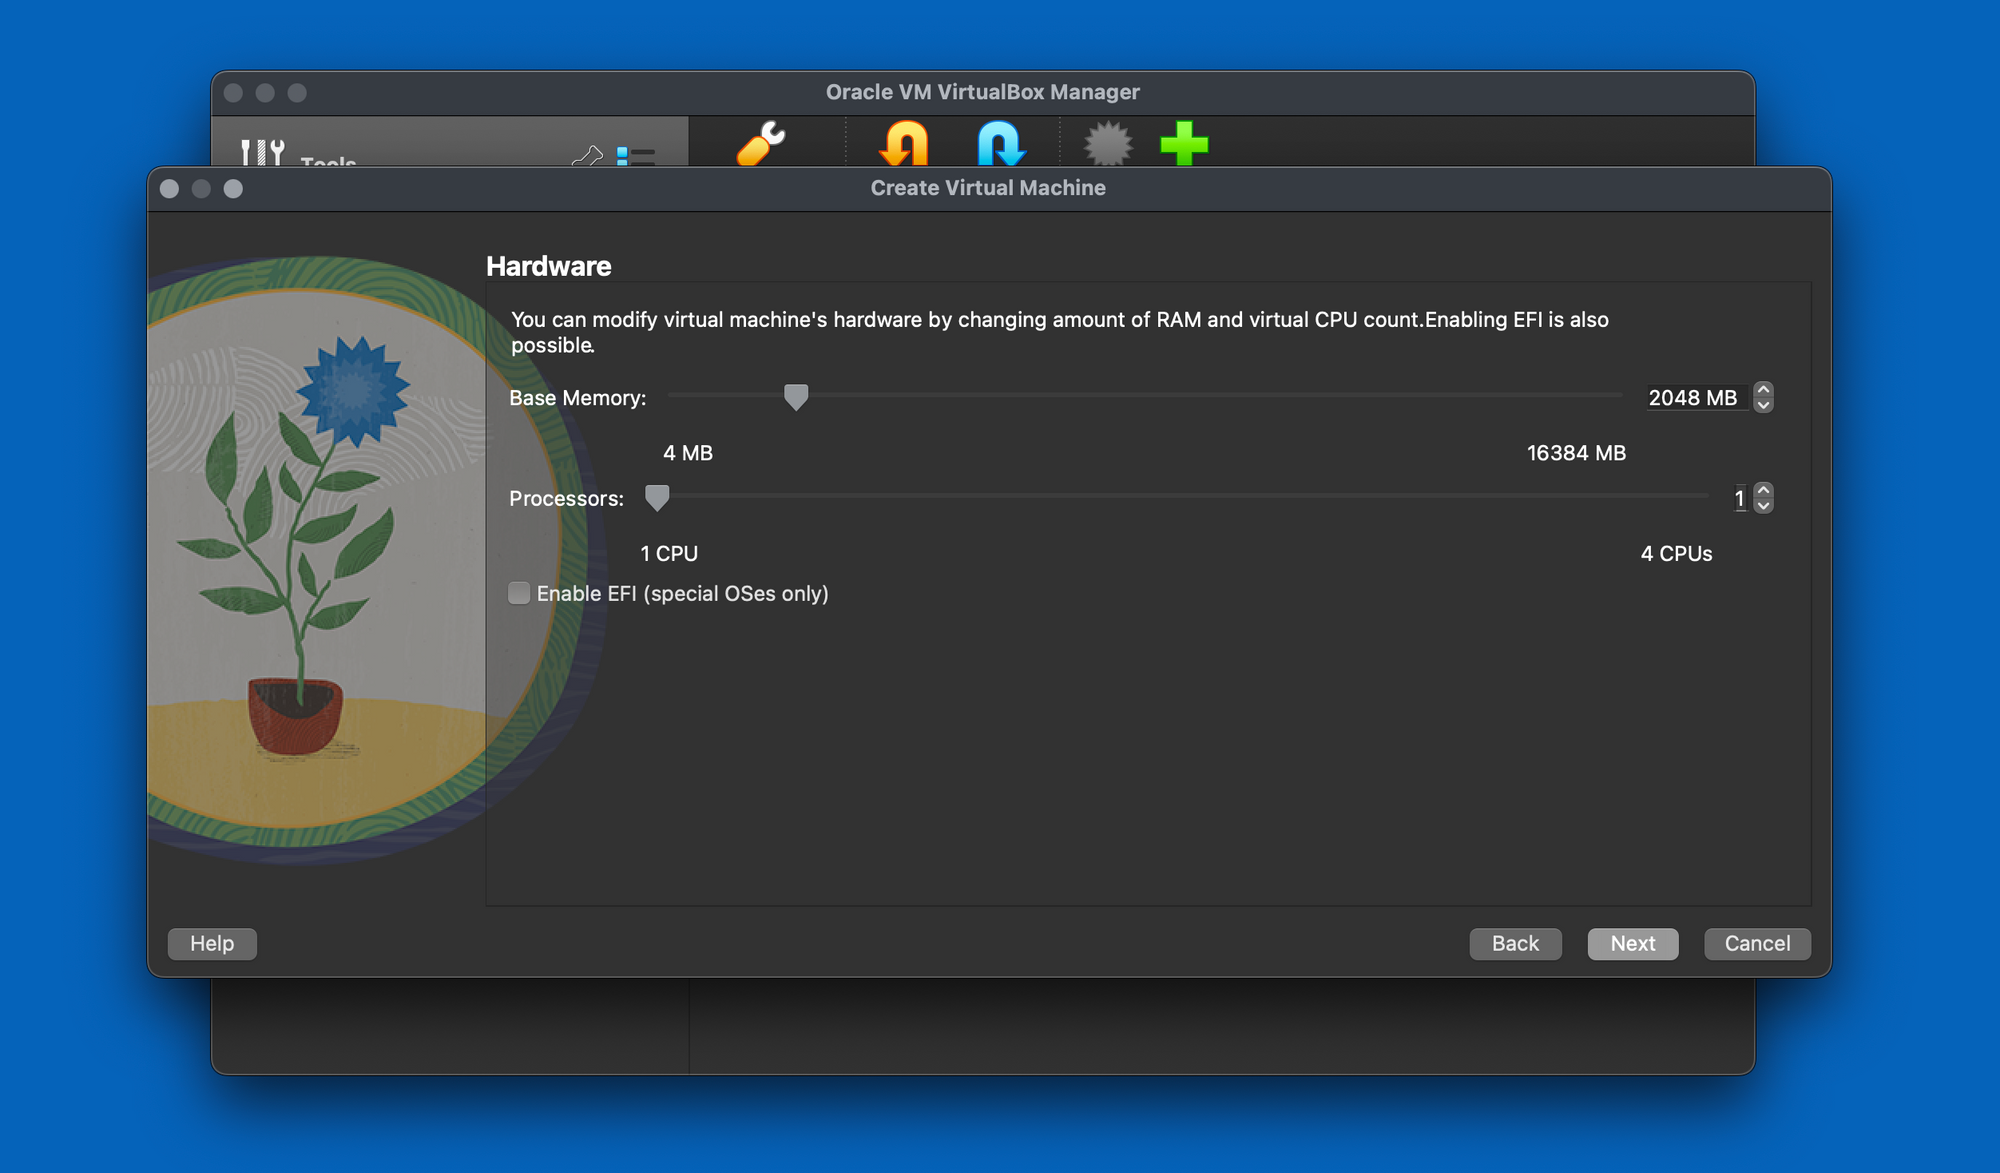
Opt for a disk size of 25GB, which should be sufficient. However, feel free to allocate more space if desired.

3- Install Ubuntu: Start the newly created virtual machine. Follow the installation prompts, including language settings, network configuration, and user account setup.
Consider installing the minimal version of Ubuntu server, as it eliminates unnecessary components present in the standard version. This approach not only conserves disk space but also aligns well with our specific requirements for the hacking lab setup.
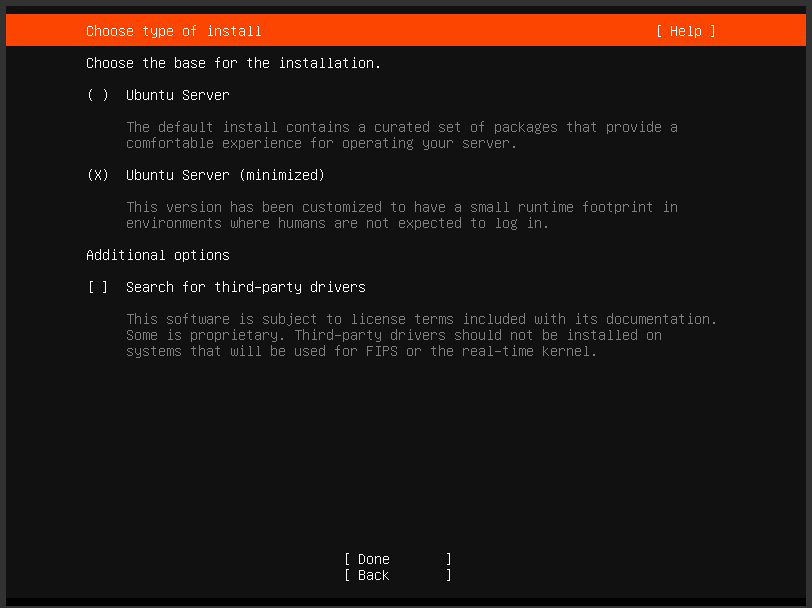
Choose the "Guided - Use Entire Disk" option for the partitioning method if you're new to Linux.
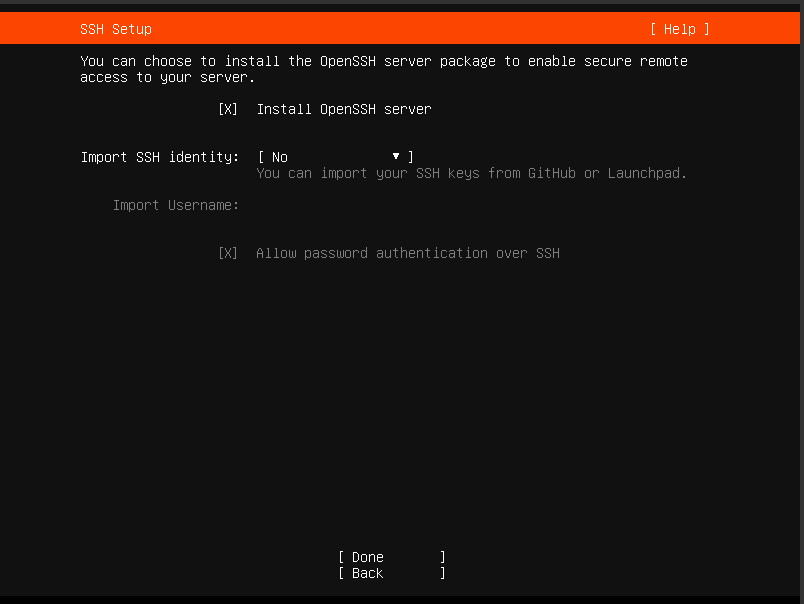
Click the "Install OpenSSH server" option. This selection grants us the ability to establish remote connections via command shell or Putty directly from our computer.
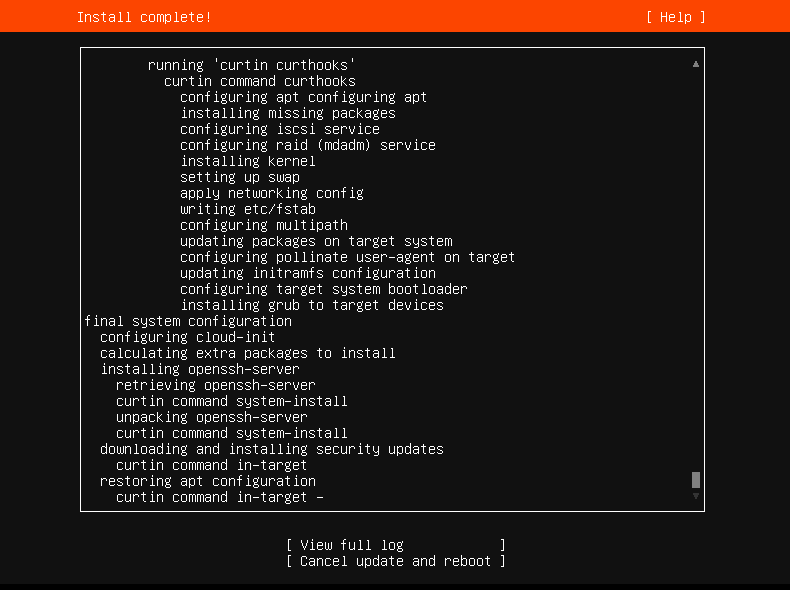
Wait for the installation to complete.
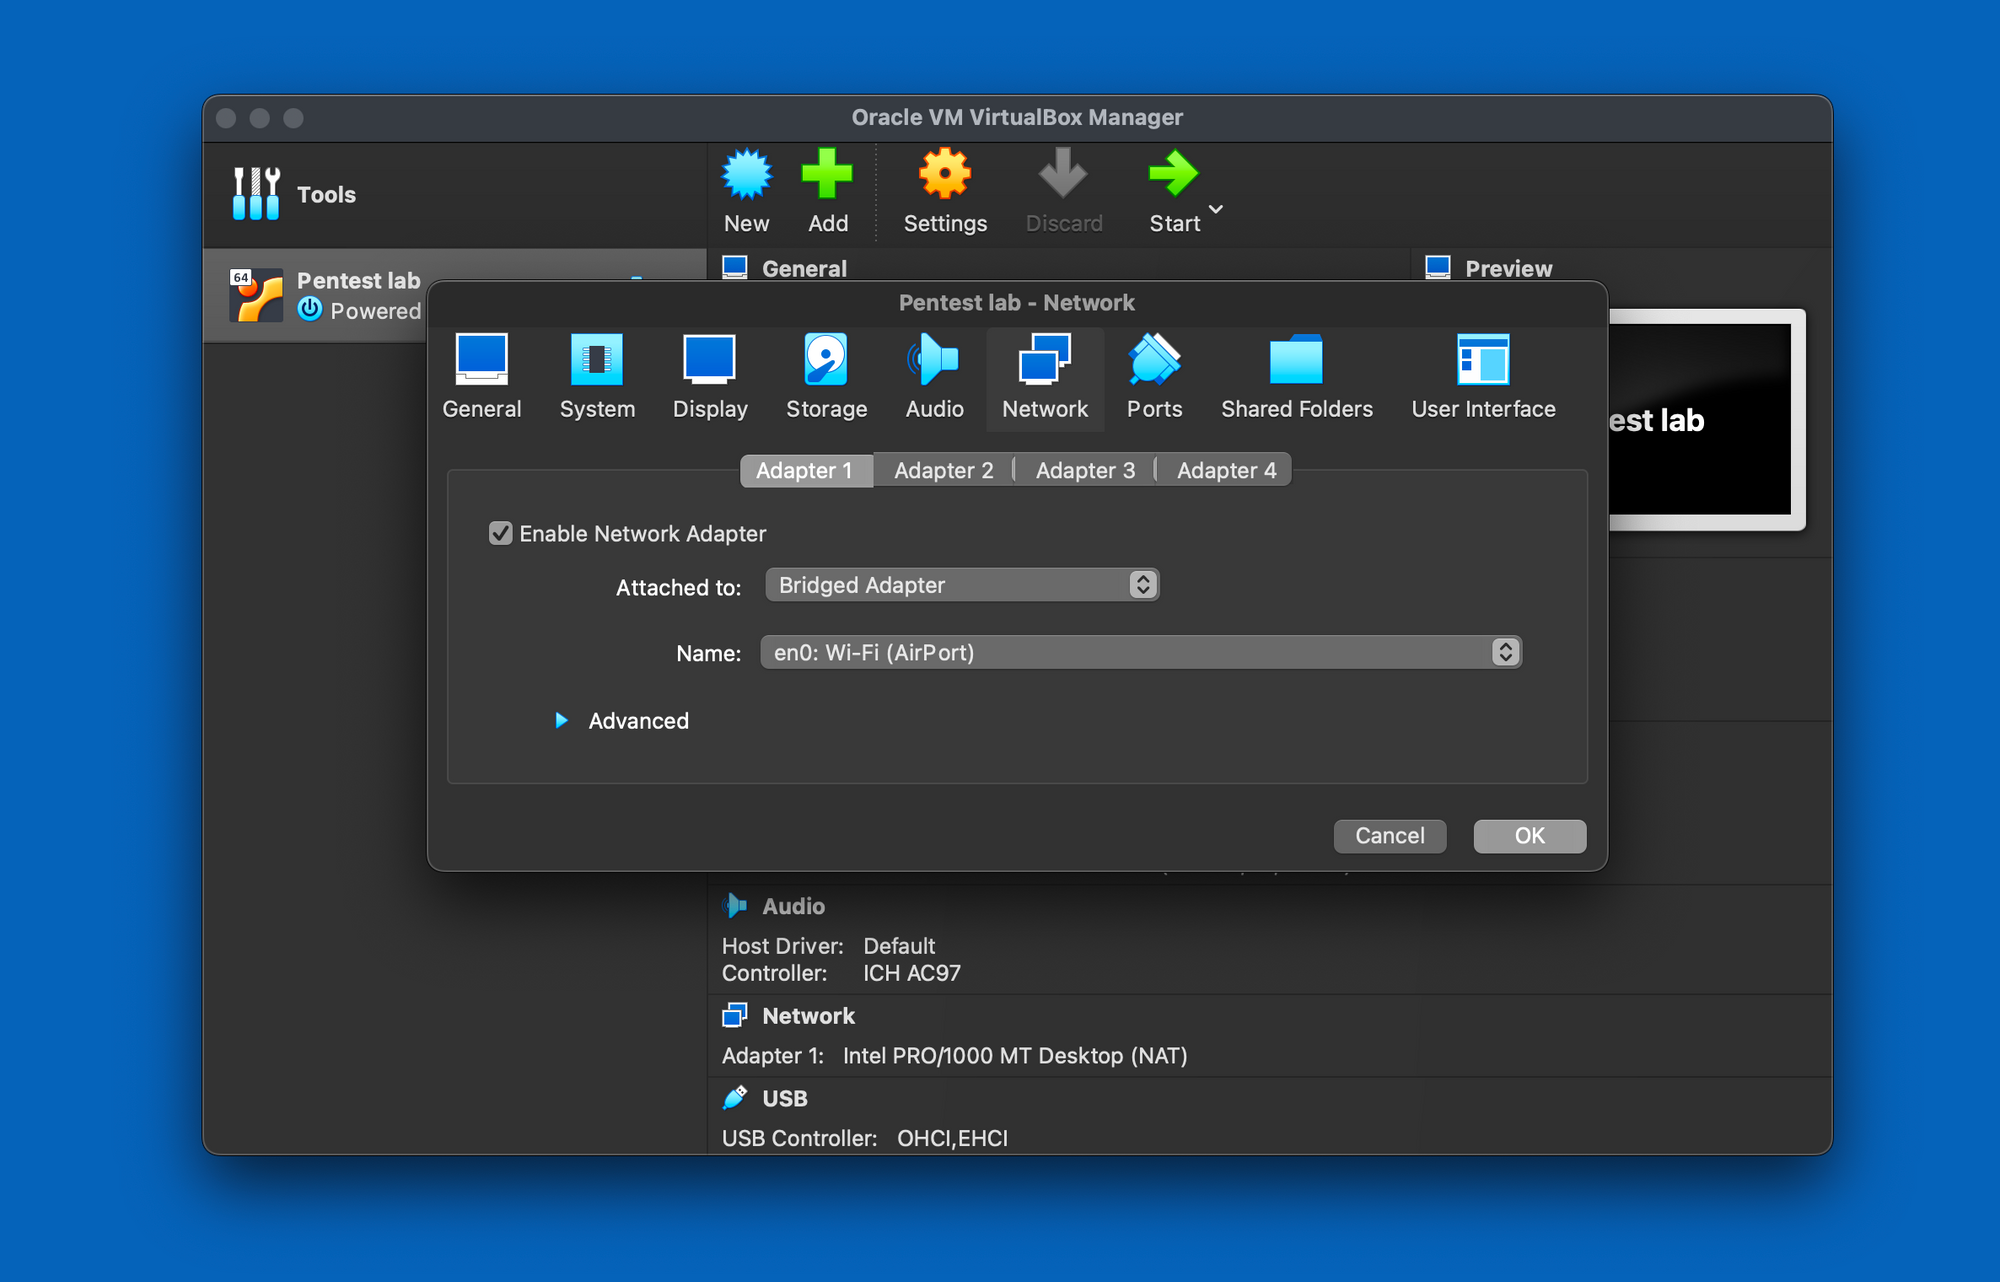
4 - Networking Configuration: To ensure connectivity between your virtual machine and the rest of your lab network, configure the networking settings of your VirtualBox machine. Choose either Bridged, NAT, or Host-Only networking, depending on your needs and network setup.
- Bridged Networking: Connects the virtual machine directly to your local network, giving it its own IP address. Useful for accessing network resources and hosting servers.
- NAT (Network Address Translation): Creates a separate network for the virtual machine, with the host acting as an intermediary for external access. Ideal for internet access while maintaining isolation.
- Host-Only Networking: Sets up a private network between the host and virtual machines. Useful for isolated development or testing environments.
Ensure the VM is powered off before making any network type changes. In my scenario, I opted for Bridged networking to grant access to the Virtual machine from any computer within my network.
Now we will set a static IP for the virtual machine. Log in with your user credentials and the run the follwong comands:
sudo su
Edit the netplan config file inside /etc/netplan :
nano /etc/netplan/00-installer-config.yaml
When editing YAML files, ensure adherence to YAML code indentation standards. Incorrect syntax could result in non-application of the intended changes.
Change the addresses, gateway4 and dns four your needs and network configuration.
network:
  version: 2
  renderer: networkd
  ethernets:
    enp0s3:
      dhcp4: no
      addresses:
        - 192.168.1.2/24
      gateway4: 192.168.1.1
      nameservers:
          addresses: [8.8.8.8, 192.168.1.1]
Then apply the netplan changes:
sudo netplan apply
To confirm the correct application of settings, execute the "ip a" command for a quick check.
By configuring an Ubuntu Linux server, you've established the cornerstone of your hacking lab environment. This versatile platform will be the canvas on which you create and explore a range of hacking scenarios and exercises. Keep in mind that while this guide focuses on Ubuntu, you can adapt the same principles to other Linux distributions if desired.
Step 3: Installing OWASP Bricks
OWASP Bricks is an intentionally vulnerable web application designed for learning and practicing web security techniques. It's an excellent starting point for our pentesting exercises.
Before installing OWASP Bricks we need to install Apache, Git and PHP 8.1.
apt install apache git php8.1Then clone the repository:
cd /car/www/html
git clone https://github.com/itsos4devs/owasp-bricks
 itsos4devs
Rename the folder from "owasp-bricks" to "bricks":
mv owasp-bricks bricksAfter that, if we browse "http://192.168.1.2/bricks/" we will have the bricks page.
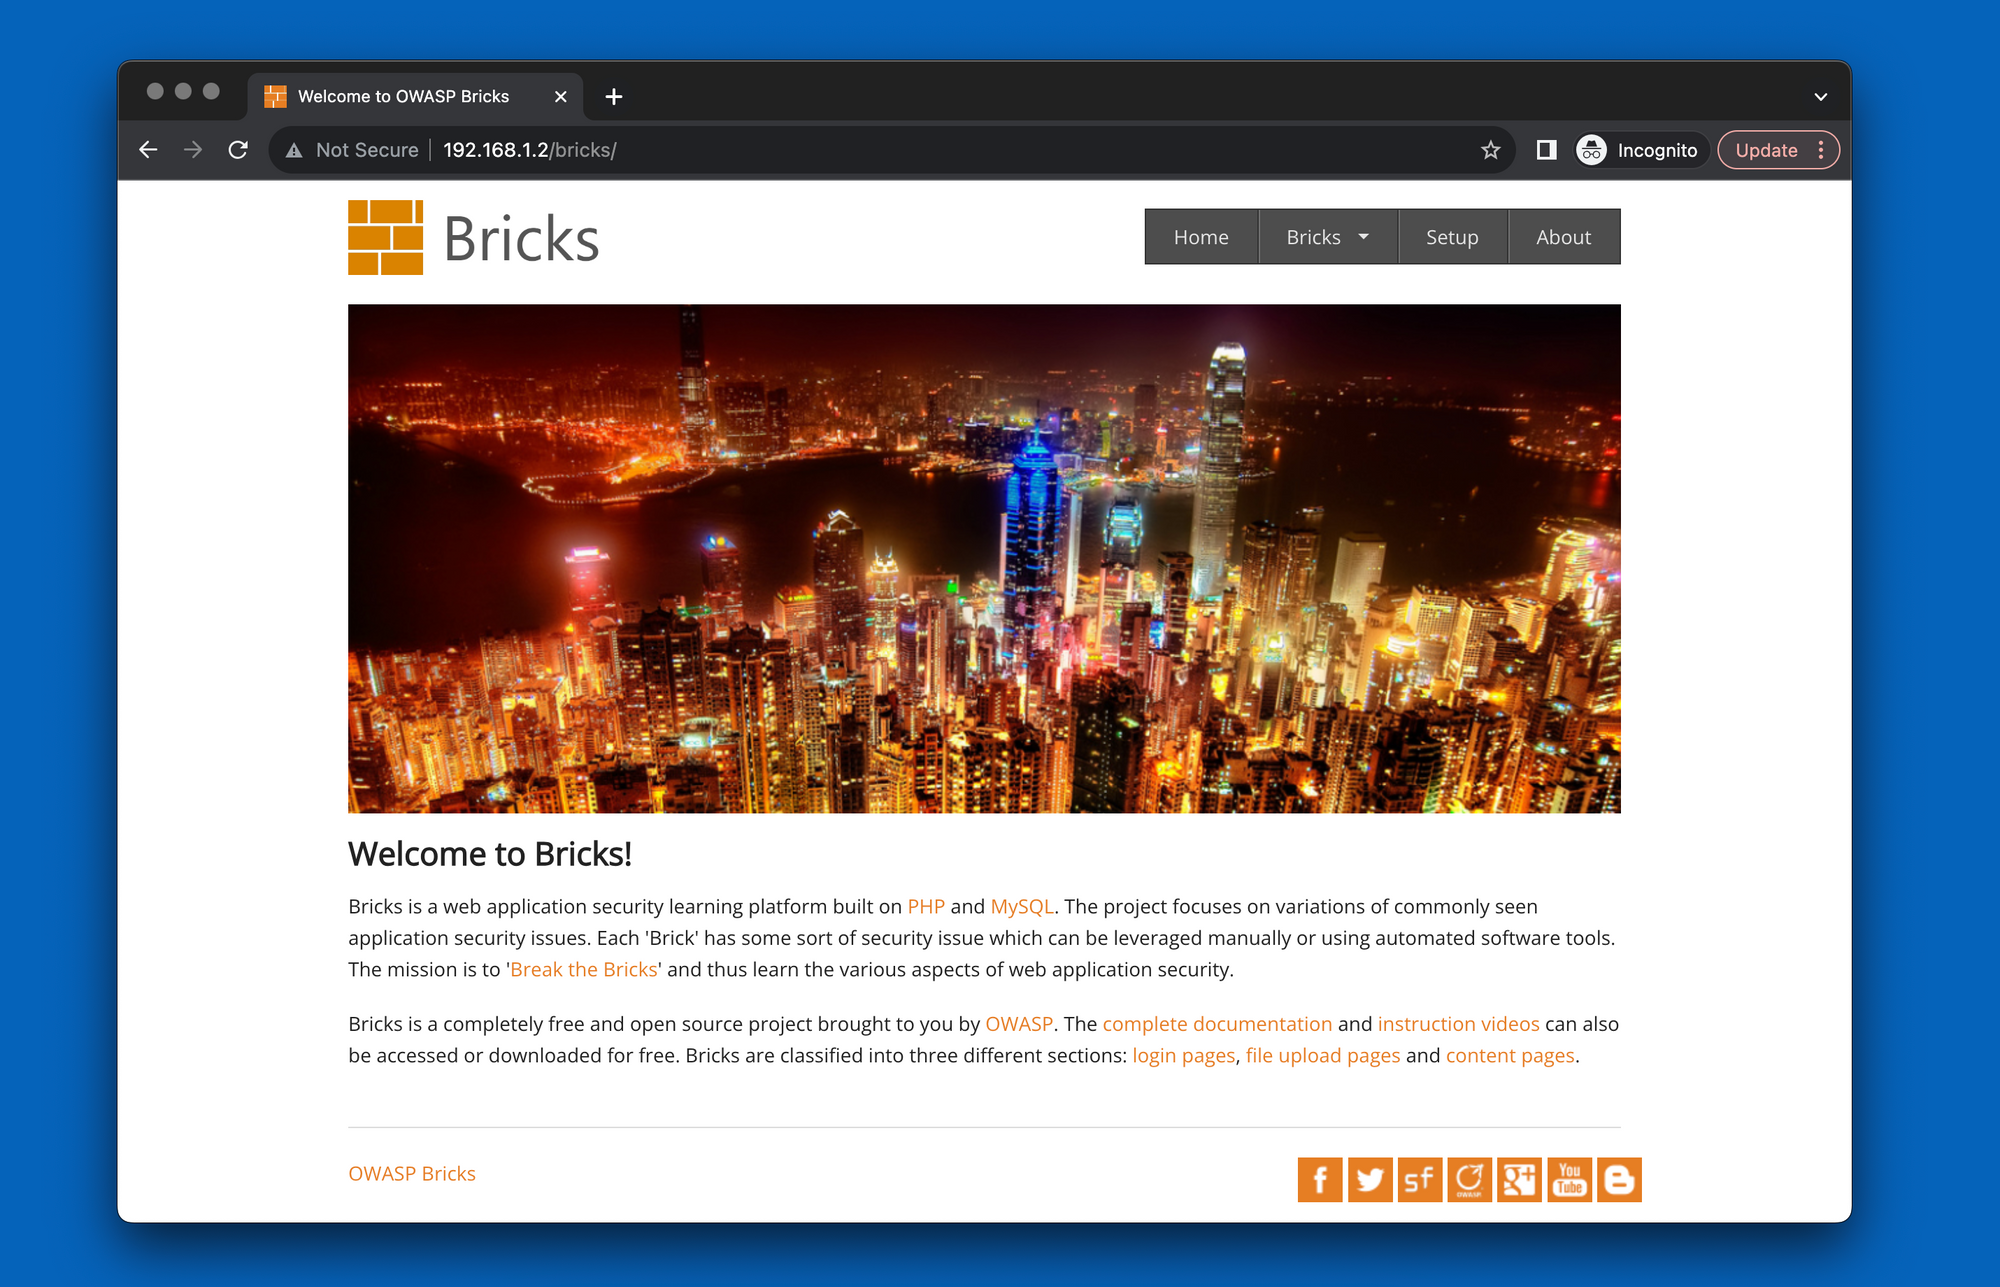
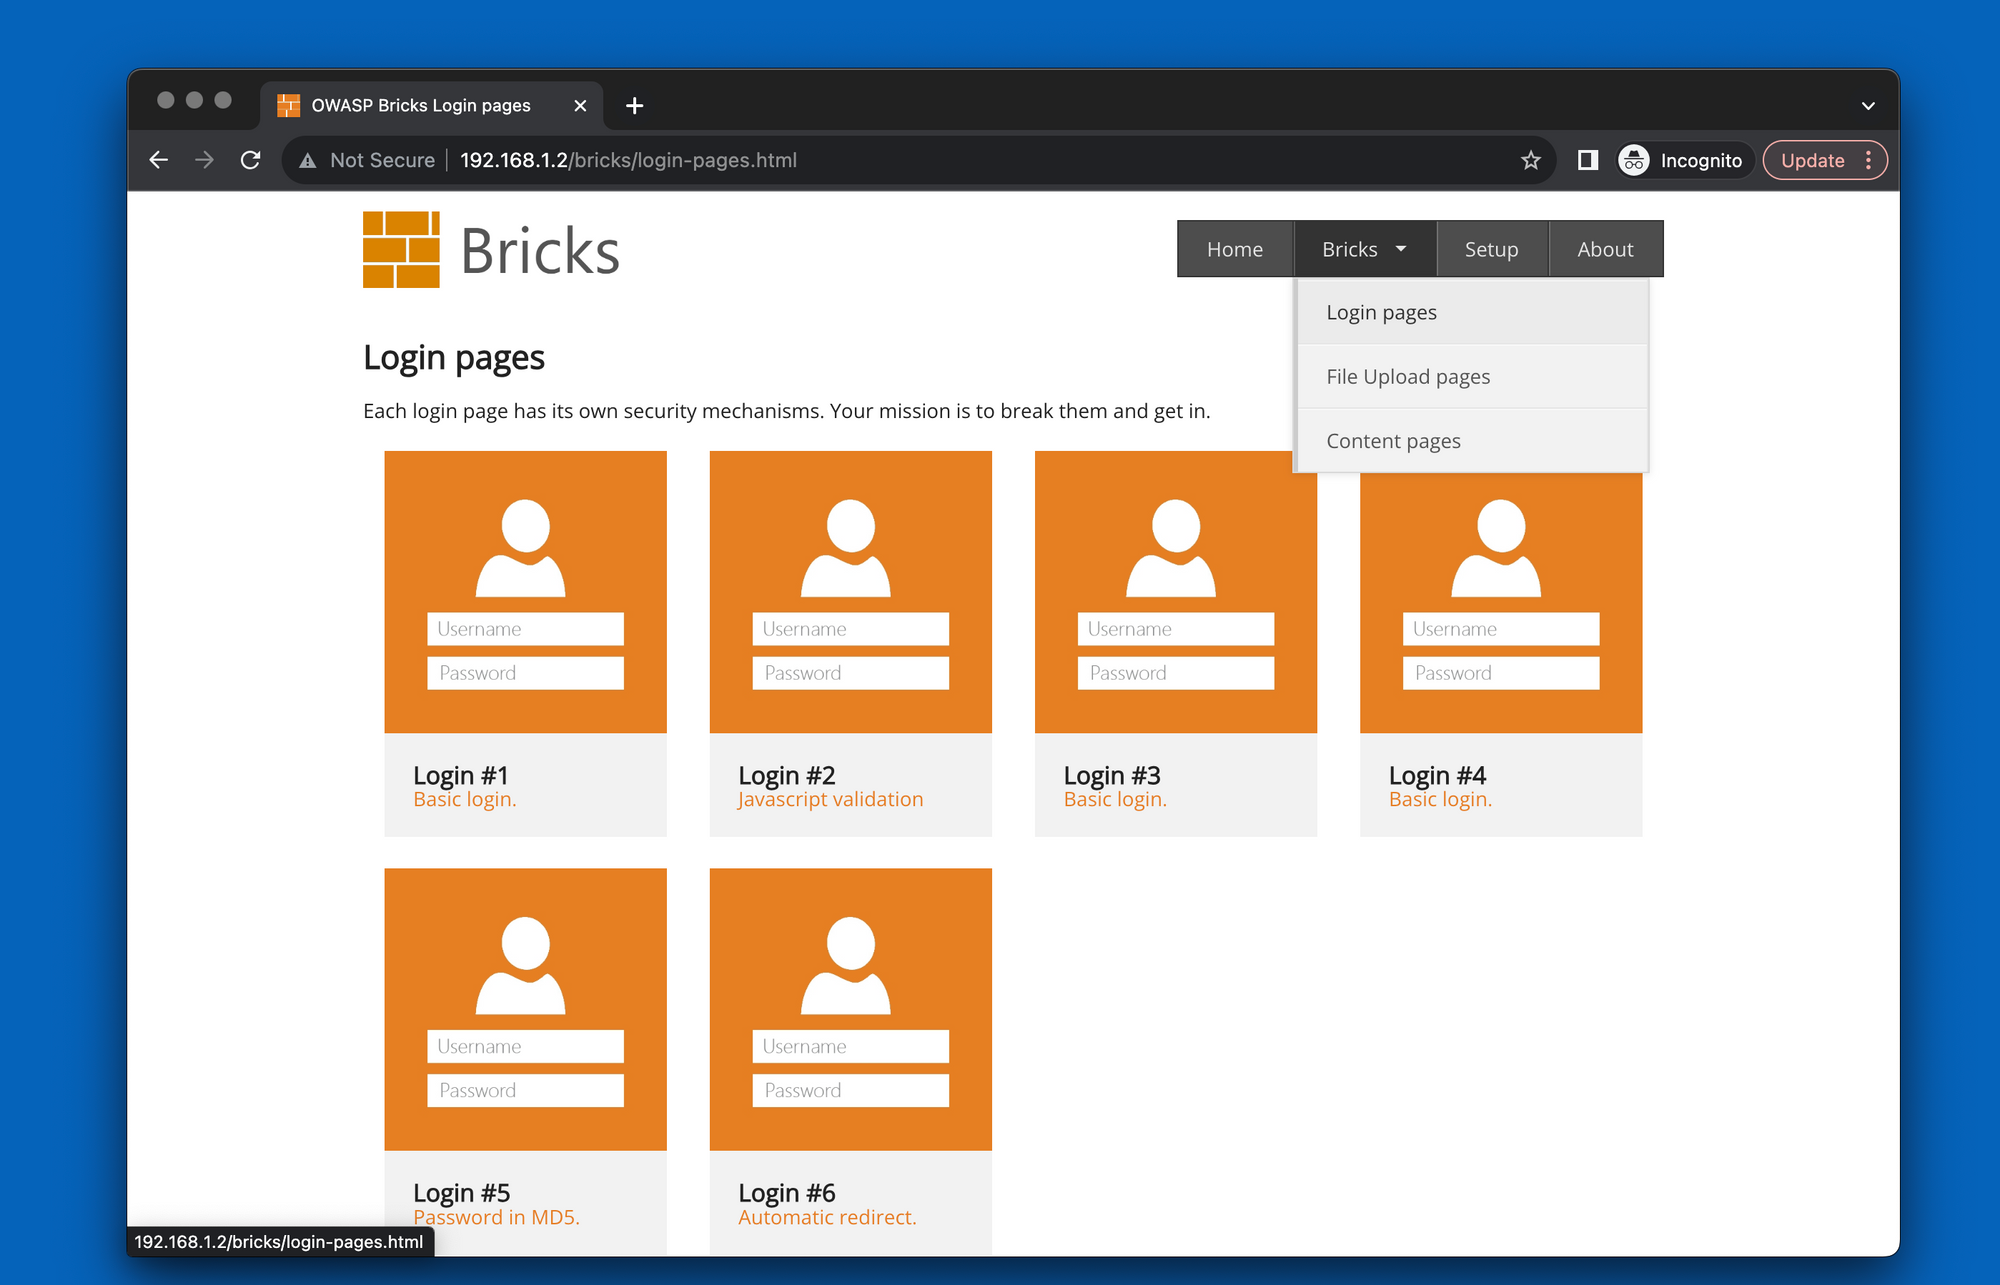
Under the menu "Bricks" we have different pages: login pages. file upload pages and content pages.
Conclusion
With OWASP Bricks successfully installed, you've laid the foundation for your first pentesting application within your self-hosted hacking lab. This initial setup will provide you with the basic framework to start exploring and honing your ethical hacking skills.
In future posts, we'll expand our hacking lab by adding more applications and challenges to diversify our learning experience.
Keep reading
Part 2 is now available for you to dive into! 🎉